Асер недавно выпустил свой новый бюджетный телефон, который стал довольно популярен среди молодежи. В новой модели появилась возможность поддержки двух СИМ карт. Также, в смартфоне улучшилась производительность, разрешение экрана и встроили более качественную 8 мегапиксельную фото/видео камеру.
| Технические характеристики и описание | |
Производитель |
Acer |
Тип |
Смартфон |
Работает со следующими стандартами |
GSM 850/900/1800/1900, UMTS 850/900/1900/2100 |
Типы передачи данных |
GPRS, EDGE, HSDPA, HSUPA |
Количество SIM-карт |
2 |
Операционная система |
Android 4.2 (Jelly Bean) |
Тип корпуса |
моноблок |
Тип клавиатуры |
экранный ввод |
Размер телефона, мм |
нет данных |
Вес телефона, г |
139 |
Функция защиты от пыли и влаги |
нет |
Емкость батареи |
Li-Ion, 2000 мАч |
Время работы |
разговор — до 9ч, ожижание — до 450ч |
Диагональ экрана, дюймы |
4,5 |
Разрешение экрана |
540×960 |
Тип матрицы |
IPS |
PPI |
245 |
Датчик регулировки яркости |
есть |
Сенсорный экран (тип) |
сенсорный (емкостной) |
Наименование процессора |
MediaTek MT6589 + GPU PowerVR SGX 544 |
Тип ядра |
Cortex-A7 |
Количество ядер |
4 |
Частота процессора, ГГц |
1,2 |
Оперативная память, МБ |
1024 |
Встроенная память, ГБ |
4 |
Слот расширения |
microSDHC (до 32 ГБ) |
Основная камера, МП |
8 |
Автофокус |
есть |
Качество видеосъемки |
1920х1080 точек, 30 к/с |
Вспышка |
светодиодная |
Фронтальная камера, МП |
2 |
Wi-Fi |
802.11 a/b/g/n, Wi-Fi hotspot |
Bluetooth |
3.0 (A2DP) |
GPS |
есть |
IrDA |
нет |
NFC |
нет |
Интерфейсный разъем |
USB 2.0 (micro-USB) |
MP3 плеер |
есть |
Наличие FM-радио |
да (с поддержкой RDS) |
Дополнительные параметры |
медиаплеер, видеотелефония, приемник a-GPS, настраиваемые виджеты рабочего стола, интеграция с социальными сетями и сервисами (Facebook, Twitter, YouTube), акселерометр, датчики приближения и освещенности |
Все действия по прошивке, получению рут доступа и пр. манипуляции могут привести к потере гарантии и/или не работоспособности телефона, поэтому вы производите их на свой страх и риск. Прежде чем что-либо делать подумайте и проверьте все многократно и потом никого не вините, кроме себя
Оффициальная прошивка Acer_AV061_V370_1.035.00_WW_GEN1 для прошивки через компьютер с помощью программы Acer Upgrade Tool
Изменена полностью программа для прошивки официальной прошивки Acer_AV061_V370_1.035.00_WW_GEN1.
Отредактирована и переведена программа на русский язык
В прошивке ничего не удалено и не пропатчено
Из изменений добавлены только рут права. По воздуху прошивка спокойно обновляется.
Инструкция
— Скачиваем программу для прошивки и устанавливаем ее
— Запускаем программу с ярлыка на рабочем столе
— Нажимаем пункт Обновить прошивку
— Пойдет установка процесса драйверов
— После установки драйверов нажимаем Далее
— Программа потребует подключить выключенный смартфон к кабелю USB
— Подключаем выключенный смартфон к кабелю USB и пойдет процесс прошивки смартфона
— Ждем окончания процесса прошивки смартфона. По завершению отключаем его от кабеля и в программе жмем Далее
— На следующее окно просто жмем Готово
— После передергиваем батарею и зажимаем клавиши Громкость + и кнопку включения и в пункте выбираем Recovery
— Выполняем два пункта Wipe Format Data и Wipe Cache
— Затем Reboot System
— На этом мы и завершили прошивку смартфона
Published on August 29, 2015. Updated: July 22, 2018
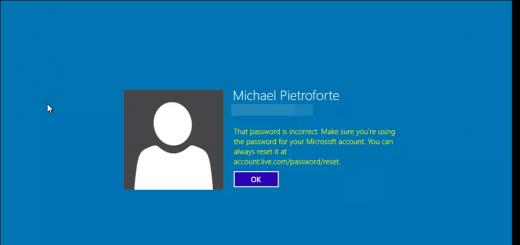
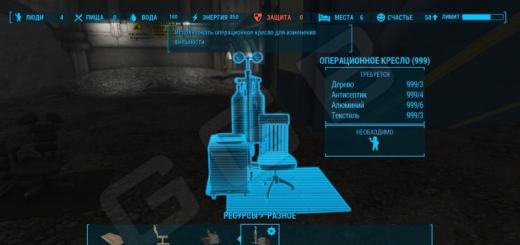
Acer Liquid E2 V370 Screen Capture
In order to update you Acer V370 device to the latest version of firmware which is build number Acer_AV061_V370_1.035.00_WW_GEN1 . you have the following three methods. Try them in order and stop after you have succeeded to update.
Before updating your Acer phone, as a precaution measure against data loss, you should backup you apps data – savegames contacts, etc. To make the backups directly on your MicroSD card you could use Titanium Backup if you device is rooted. The Acer backup and restore app might not do the trick between different firmware versions (at least this is what I have discovered). You could also manually backup / export or sync online some elements for future restoration.
Method I: Make an OTA (Over The Air) update from the Acer server
Make sure that you are connected to the internet trough WiFi and that the connection is working
Go to System Settings
> About phone
> System updates
Click on Check now
If an update is found the download will begin. After the download is complete you will be prompted to install the update.
Make sure that you have the battery at least 50% full before you install the update
The OTA update process is automatic. It will take a bit longer for the phone to start first time after the update.
Some applications will also get processed at the first startup after the update.
There could be a number of reasons for which this process can fail. Generally if the OTA update fails to install, you will be prompted with an error message in the recovery menu. You might restart the phone to get back to the state before the update. This is also the case if you have a custom ROM/recovery like ClockworkMod recovery which is different from the factory recovery, the one that can properly handle the OTA update script from Acer. If you previously install a custom ROM please go directly to Method III .
Method II: Update from the MicroSD card
Copy the *.zip file below (after you extract it form parts) on your MicroSD card either by USB data Cable while the phone is ON (with the card in it) or remove the MicroSD card from the phone and connect it to the computer via a USB card reader or adapter:
This update file from Acer website is for both Single Sim and Dual Sim versions of the phone.
Copy the *.zip
file as it is
on the root of the MicroSD card (that is at the same level where all folders are, like DCIM, Music, Pictures)
You might rename the update file to something like ”
update.zip
” (I assume you see file extensions)
Reboot your phone into recovery mode (MicroSD card inside, update.zip on the card, no cable left connected, 50% or more battery):
Turn OFF your Acer phone, wait for the complete shutdown vibration, then start the phone by keeping the VolumeUP button pressed. Press VolumeUP again to select . To enter press VolumeDOWN . There, in that small menu, there is also which is starting a USB communication interface for PC-USB transfers before boot, and which will start the phone as usual…You will see the picture of an green adroid in the center of the screen and the text “No command.” To actually see the hidden recovery menu press the POWER button again once. Use the VolumeDOWN button for menu navigation and the VolumeUP button to make selections.
Select ”apply update from sdcard ” > ”update.zip ”
Confirm the update operation by selecting ”Yes ”
The update will start to install. Give it time to complete.
Afterwards delete the update file from you MicroSD card to free up space.
However, if this method does not work for you, as there could be many reasons, you must start over fresh with your Acer, by first installing an older factory firmware and afterwards the update package as described above at Method II. To do so, please read the following:
Method III: Full internal memory flash and then apply the update from the MicroSD card
For this you need to update your Acer by a special PC software called SP Flash Tool. This method will also resolve any other software issue (bricked device) that you might have as the entire internal memory of the device will be reconstructed. As this phone is a MTK 6589 device please read the following publication to see how this works:
Download the software and the drivers required for your windows PC:
If you are on a 64 bit Windows you might need to manually disable the driver signature enforcement before you can install the MTK drivers required for flashing.
Download the Ice Cream Sandwich (ICS) – Factory firmware for your version of Acer Liquid E2 V370:
Flash you Acer device (read the publication above to understand how). After the phone has booted back up, follow the Method II and apply the update to latest firmware version. Method II should work now as the internal memory has been re-written. If still, it does not work, you might re-download the update file from Method II and follow the steps from there again, from the beginning.
More from сайт
- Samsung Galaxy Mini GT-S5570 (also known as Samsung Galaxy Pop in some countries) is a compact smartphone device announced by Samsung in January 2011. For a complete list of specifications for this device go to…
- What are the uses of Odin 3? All modern Samsung devices capable of communicating with a computer trough a COM port can use the download interface provided by Samsung to write new firmware to its…
- The following archive contains MTK interface drivers (32 & 64 bit) for Windows XP, Windows Vista, Windows 7 & Windows 8: Download MTK Drivers (32 & 64 bit) XP Vista Win7 Win8 Microsoft Windows 10 MTK Drivers (32 & 64…
Для тех кто только стал новичком или не является знатоком в огромном мире Android и не особо знаком с понятием как - Root Android , а также зачем он нужен, что можно сделать после получения Root прав или как в последствие от них избавиться если они будут уже не нужны, все это можно узнать из подробной статьи - !
Прежде всего!
В данной статье нет "левых" ссылок или не нужных действий! Если вам действительно нужны Root Права, то читайте внимательно и выполняйте шаг за шагом, это гарантия что вы сделаете все верно! Данная статья по получению Root прав разделена на две части: Первая часть - это Необходимые компоненты и условия , вторая часть - это Инструкция как с помощью полученных файлов и программ получить root права. Если в процессе получения root прав Android постоянно перезагружается или в процессе вечной загрузки (случается крайне редко, но все же), то стоит . Теперь приступим к получению Root прав!
Производители Android иногда выпускают новую прошивку, на которой не получается получить Root одним из предложенных способов, если в статье есть еще альтернативные способы, пробуйте их. Не получается все равно? Укажите версию Android и версию прошивки в комментариях (не стоит писать злобные говнокомментарии, этим вы не положите ни себе, ни другим). Завис Android (не загружается), читайте и перечитывайте с самого ПЕРВОГО АБЗАЦА, все необходимые ссылки в статье присутствуют!
Остались вопросы?
Остались вопросы или не получается получить root права на свой Android? Оставляйте комментарии, о том что у вас получилось или не получилось, либо вы сделали иначе.This is a list of characters from the Pixar franchise Cars :
Piston Cup teams
Rust-eze Medicated Bumper Ointment team
Lightning McQueen
Lightning McQueen , often referred to as "McQueen" , is the protagonist in the Cars film franchise. He is voiced by Owen Wilson and he is modeled after a 2006 Ford Scorpio NASCAR
Mack
Mack (voiced by John Ratzenberger) is a 1985 Mack Super-Liner bearing license plate "RUSTEZ3". A dedicated member of the Rust-eze Medicated Bumper Ointment Team, having the role of McQueen"s transport, Mack pulls Lightning McQueen"s trailer to his races. Lightning"s one loyal team mate after his entire pit crew resigns in protest at the end of the season decider, he inadvertently sets up the predicament suffered by Lightning McQueen throughout the movie.
McQueen exhorts Mack to drive through the night to his tiebreaker race with Chick Hicks and The King in Los Angeles, despite federal DOT regulations which legally grant Mack ten hours daily of much-needed off-duty rest alongside "all those sleeping trucks" at the last truck stop on I-40. Lightning hopes to reach the venue first and to hang out with the Dinoco team. As a result, Mack falls asleep and, distracted by the Delinquent Road Hazards (who attempt to push him off the road to the shoulder), loses Lightning. Mack arrives in Radiator Springs after Doc reveals Lightning"s location and is both very relieved ("Thank the manufacturer, you"re alive!") and apologetic ("I"m so sorry I lost you, boss. I"ll make it up to you..."). Lightning, who is glad to see him, forgives him.